I've just returned from a week in Cornwall and a week away from technology was exactly what I needed after the hectic final weeks of Transcription. Unfortunately, this meant I missed the new project briefing, but I have been reading through the paper brief this morning and looking at some previous examples on the E4 website.
I'm going to hopefully spend the next two weeks over Easter working through my initial ideas and storyboarding what I have. Having only 10 seconds to produce should mean that I can produce a lot of small storyboards for different ideas. I want to do a character based Ident as I can use what I learnt last project of inanimate objects squashing and stretching. Whether or not I have time to produce a human cartoon character I'll have to decide.
This project is definitely going to be quality over quantity and probably more of a sprint than the marathon that was Transcription. I do think that transcription has given me a lot more skills that can be put to use. Hopefully I can show that in the next few weeks.
The last few week's tutorial videos have been sitting on my desktop and I realised I haven't post them up for quite a while, mainly because my head is in the land of suitcases and deserts. Below are the Dynamic / Particle collision and instancing tutorials.
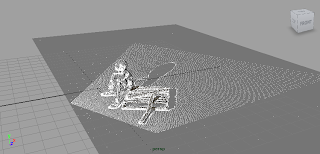
Dynamics One
Dynamics Two
Dynamics Four
More Dynamics:
http://samhayes101.blogspot.com/2011/02/dynamics-week-three.html
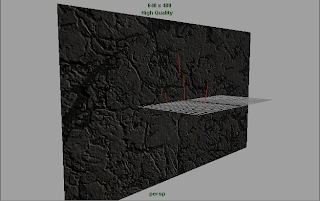
Normal Mapping
Using Nvidia's normal map filter in Photoshop to produce a normal map from a beauty image:
Using Maya's transfer map utility to create a normal map from a high-polygon mesh:
Creating normal maps from beauty in Photoshop for use in a Maya scene:


Dynamics One
Dynamics Two
Dynamics Three
Dynamics Four
http://samhayes101.blogspot.com/2011/02/dynamics-week-three.html
Normal Mapping
Using Nvidia's normal map filter in Photoshop to produce a normal map from a beauty image:
Using Maya's transfer map utility to create a normal map from a high-polygon mesh:
Creating normal maps from beauty in Photoshop for use in a Maya scene:
Games modelling tutorials:


Some of these I completed over the last few weeks, others I have had to catch up on. Below's tutorials have taught me a lot about rendering and achieving desired results in Mental Ray rendering.
Transferring lighting from Maya Software to Mental Ray
Motion Blur
By changing shutter settings, sampling and blur-frame ranges, different effects can be achieved.
The motion blur on the wheel differs using different Shutter open/close settings, Time samples and motion steps.
The wheel can also be motioned blur using the no deformation setting, which although quicker to render, can have less quality.
When rendering motion blur, the Rasterizer rendering method can be used rather than Scanline, as shown below. In the second image, the shading quality has been increased.
Depth of Field
Using basic Depth of Field on a May camera in mental ray can produce some good results once the Sample and anti-aliasing settings are adjusted.
A mental ray lens can be added to the camera called 'Bokeh', this produces a better quality Depth of Field and once the distance is measured and the 'Plane' attribute changed, some impressive and simple results can be achieved.
Final Gather
This tutorial helped the final gather settings seem much easier to understand. Below shows the way it can be diagnosed and be optimised changing the settings. It is also important to Optimise the map for animation to avoid shadow issues.
Global Illumination
Using Photons in an area light and a Mental ray 'Temperature' node on a directional light allows global illumination to be used effectively. It can be diagnosed similar to Final Gathering, as shown below.
Caustics
Caustics can create more realistic glow effects through materials as well as colour bleed where light bounces and reflects surfaces. By increasing the caustic colour a glow effect can be achieved like below.
Mia_material_x
This tutorial showed the range of material presets in Mental Ray's Material_X shader.
Physical Sun and Sky
Below are some shots from the Physical lighting tutorial. It shows the effects of changing a few settings such as Saturation, Red/Blue shift or Horizons.
Shadow softness settings on the Physical Sun node:
I'll post up the remaining tutorials tommorow, I'm in the middle of rural Cornwall for the next few days but hopefully I can find Internet somewhere to upload some more images.
This was a requirement at the critique. I did have a copy, but It wasn't what I wanted to submit, so I have been re-working it until now. I am hoping that is not something I will marked against.
This animation was the biggest learning curve for me since the start of the course. It was 10 weeks of trying new techniques and trying to avoid leaving a gap in the production pipeline at all. To reflect that, I wanted to submit a well put together Making Of document, which I couldn't have done on Thursday without sacrificing something in the animation. (Maybe this was time management, but I don't think I could of slept any less) Either way, below is the finished document, I'm hoping it will cover the past 10 weeks' struggle.
Making of the SuitorFull Screen version: http://www.scribd.com/full/52650093?access_key=key-4hr0e5va9ql6u0v8c7t
I now have some tidying up to do on the tutorials, ready for posting up. I'm hoping I won't miss any of them.
I'll be updating this post with my making of soon. I created a version yesterday when I was short on time, but I'd rather have a more complete and detailed article for my animation, considering the time it took to make. I'm going to tidy it up, add more information and create some more renders. I'm a bit annoyed that I didn't have that version handy on me at the crit today, but I assumed we'd all be showing our animations without too much explanation as in previous critiques, I'd have liked to have shown the process a bit more, but hopefully it won't affect the result too much.
The suitcase was the most technical part of the animation, which is why I chose to focus on it for the Technical Paper. Below is a short summary of how it was created and the methods used.
Technical Paper
Technical Paper
I've used the Steam Train for the demo reel element this project, mainly because It was the object with the most detail and I did spend quite a bit of time early on in the project working on it. I have tried uploading to Vimeo but an error left me videoless. I've put it on Youtube for now, which seems to have encoded it at the quality of a boot fair VHS, so as soon as I can, I'll have another crack at putting it on Vimeo.
As projects progress personal branding becomes more important, especially as it is required in this submission. Below is the first business card design, I'm sure it will change in future projects and be improved. With the design I was trying to match the mood of my animations (Past and present) and I hope it gives the brand a cartoon, 'lighthearted' feel.
All the shots are rendered and edited. Animation-wise I just have to tidy up the music and sound effects in Premiere. The final edit is just over 2minutes 30 seconds, which is roughly what I was aiming for. I'm going to spend the day working on my Making Of, then move onto preparing the final animation edit this evening.
As for the Making Of, Technical Document and Demo Reel I may not finish them for the submission disc, if not, I will post them on the blog tommorow. I still have a busy day (and night I expect) ahead, but knowing that the animation is edited is a good morale boost.
Below is the DVD disc design, I've tried to keep it simple to show the style and colourful to match the animation. Hopefully I can get this printed in the next couple of hours (IT staff depending!)
The last week has been a bit of a blur of rendering, animating and compositing, but I am definitely getting closer to a final animation. It really is difficult to anticipate all the work that comes with such a simple story and short animation, and it is something that I definitely will not underestimate again in the future. Saying that, I'm confident that I will have the animation completed and the story will be resolved at around 2-minutes in length (Perhaps a little longer)
One thing which I realised I have done right is the way I created my sets. I created about four scenes with a very strict set (only works from a few camera angles) which allowed me to pinpoint what needed to be worked on and avoided putting detail into anything that wouldn't be seen. This has been really helpful over the last few weeks when animating, as I can just drop the character into the scene, animate him and tweak the lighting before rendering. It is also true though, that animating has been by far the biggest challenge over the last few weeks, but I'm hoping the characters are portrayed well enough for the story to come through fine.
Over the next couple of days, I have about two shots of Pre-viz to finalise and render as well as produce the making of, so there is no spare time floating around.. On a sidenote, I am really enjoying the compositing side of things, working in After Effects with painted backdrops and blending 2D into 3D using Maya cameras, and compositing Effects over the action. I'm considering putting more emphasis on this, and I think I'd really enjoy focusing on this in a future project, perhaps learning the full possibilities of After Effects or finally getting the chance to try and learn Nuke.
Here are a few shots of the later part of the animation, where the suitcase is catching up with the train. The animating has had a few headaches (Everything moving at speed while things are individually animating) but it has also come with a huge bonus of learning how to solve or move around problems.
I think it is very easy to get tunnel-vision at these stages, and forget how the animation looks to an audience rather than to yourself, if anyone has any comments of things that look 'off' through the last few posts then I won't be too annoyed when it comes to fixing them (But I definitely will be a little)


